using the white balance settings on the camera take
a sires of images using various white balance settings
for the following three lighting conditions
bright sun
cloudy
open shade on a sunny day
auto
CLOUDY DAY
These images were taken on a over cast day.
I choose to take the image of this brickwork as it was
much easier to distinguish the tonal changes.
As noted in my introduction to colour balance the
colour temperature in overcast sky is a tungsten reading
of around 6500k.
This means the cloud cover diffuses the light from the sun and
light is read by the camera as cool.
aperture priority f4.2. mid morning shooting time
AUTO SETTING

white balance was set to Auto which means the camera is going
to try to compensate for the light reflecting into the camera.
The kelvin reading in the raw converter was 4800k. This
is very cool and as daylight is 5500k it clearly shows the
image is too cool.
You can clearly see the image has a blue tone to it.
CLOUDY SETTING

this image was taken with the white balance set to cloudy. The camera
will read this that the image is cool and so added warm tones to the image.
this image is clearly warmer than the the shade image below.
SHADE SETTING

This image was taken with white balance set to shade.
As with the cloudy white balance setting this image as been
warmed up by the camera to counter balance the cool light
reflected from the building.
PRE SET CONDITONS

the final image shows the image with a preset white balance to
the lighting conditions. This clearly shows the image has been
warmed up by the camera. The kelvin rating on this image in
raw converter is 7050k. This reads as a warm image.
SHADE
The temperature of light in a shaded scene is very blue
and is around 7000-8000 k on the kelvin scale
As cloudy skies to achieve colour balance, the white balance
will need to warmed up.
I was standing under a tree canaopy whilst taking this image
so the camera as shaded
aperture priority f5, early evening shooting time.
AUTO

This auto wb balance setting clearly shows a blue colour tone.
The grass tones and the blossom visually look darker and bluer
then the other images in this sires. I would expect in auto mode
to he camera to warm the image to counter balance the blue tones
of the available light.
SHADE

This image is visually warmer that the auto setting. The image
looks that colour yellow has been added to counter balance
the blue available light. I think I would manage the yellow tone
in photoshop to try to improve the tone of the grass which
looks too yellow in this image.
CLOUDY

The above image colour is better balanced than the image
shot with WB set at shade. The colour tones seem more visually
correct. The image is still clearly bluer than the shade image.
It is not far away from the AUTO image. I would slightly warm
this image in photoshop by adding red to the image in
photoshop.
DIRECT SUNLIGHT

The sun broke through clouds as I took this image so tit was apt
that the WB was set to direct sunlight. The colour tones are again
bluer than the shaded setting but the colour tones are a better
representation of the actual colours . I think as the sun had come
out the light tempreture would have been warmer so the image
looks correct. If the light had still be shaded the image would
have been too cool as WB set to direct sunlight would try
to cool the image as direct sunlight has a kelvin reading of
below 5000k kelvins which reads in the camera as warm
or red tones.
PRE SET WHITE BALANCE( custom)

I pre set the white balance for the available light and the image
appears to be warmer than the other pre set white balance settings
again the image has more yellow added to counter balance the
blue lighting conditions. When processing this image in photoshop
I would add a small element of blue to reduce the yellow tone.

The image above is reprocessed with a blue added in photoshop.
DIRECT SUNSHINE
Light temprature that is below 5500k is read by the camera
as warm so any WB compensation by the camera will be
to cool down and reduce the red tones. Such as using a
80a filter in film photography when taken tungsten images.
Aperture priority f25 , Late afternoon 1 hour before sunset
AUTO

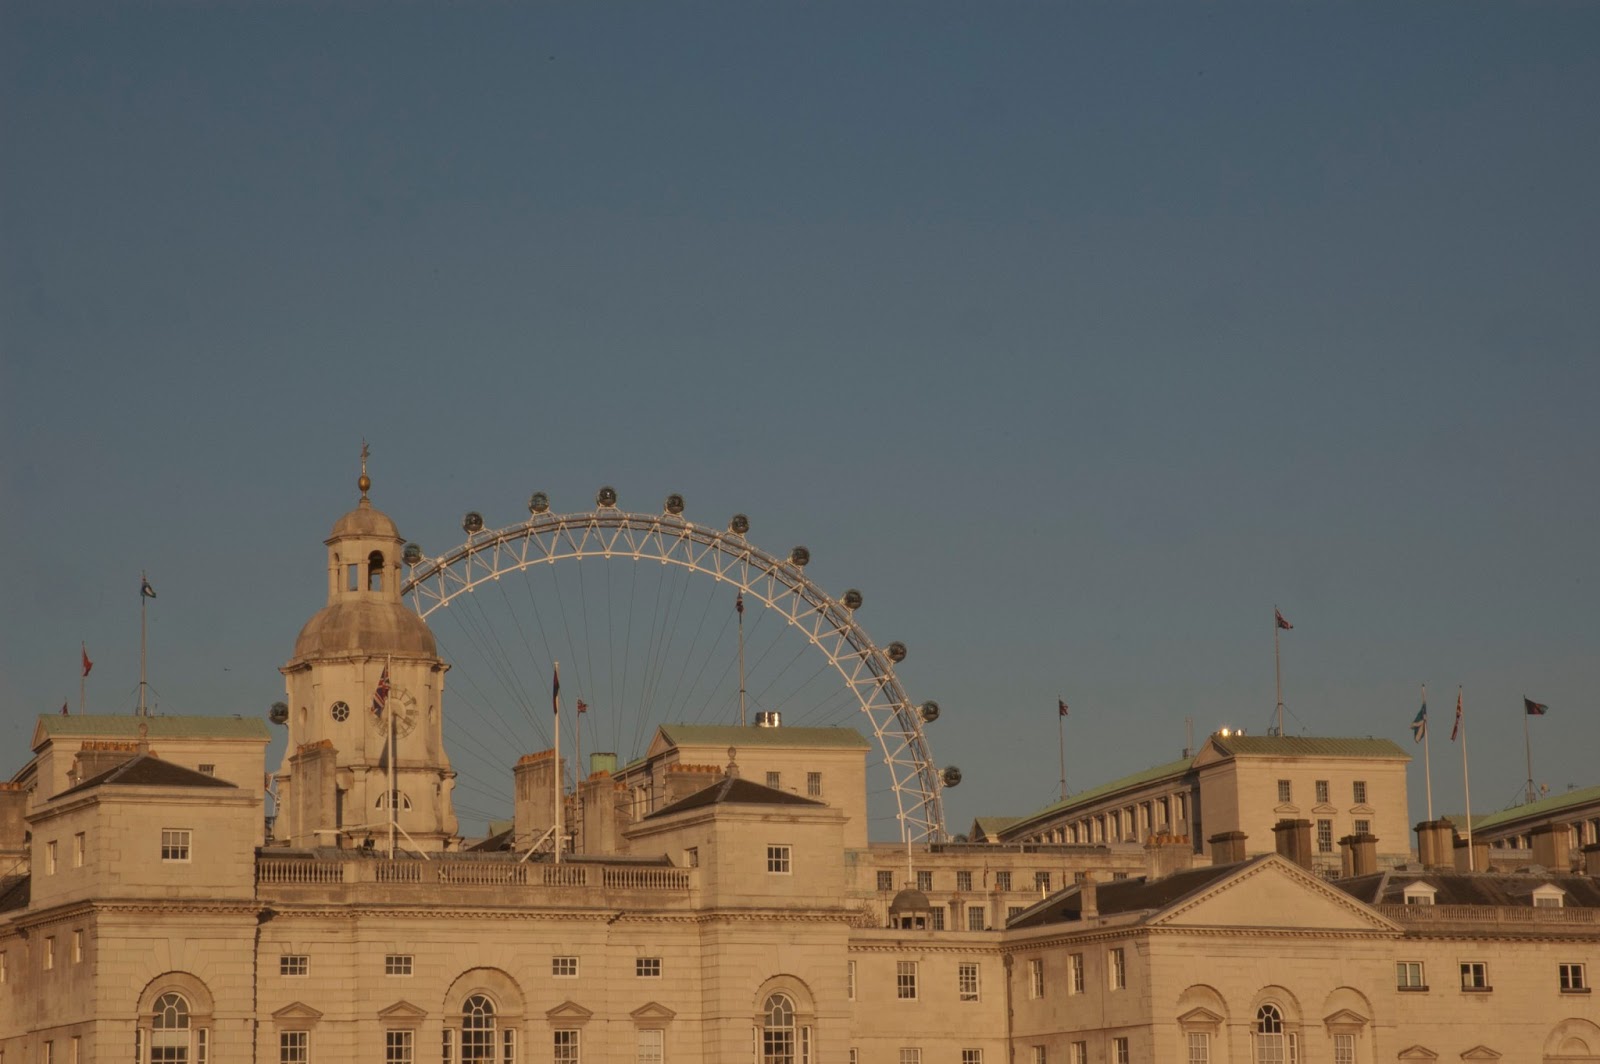
The actual building is white stone but the sun was
low in then sky so the light was reddish to the eye
but the building was still white to the eye. The image
itself is bluer that the actual scene and the camera
has readjusted the colour by adding blue to the
scene
DIRECT SUNLIGHT

re balanced the colour. The image is colour balanced correctly
as the building is white and the green roof panels are clearly
visible where they are muted in the other settings.
SHADE

Shaded images are blue so the camera will compensate by adding
red into the image. This is very visible in this image, which is
very evidently not colour balanced. Shaded light is bluer than
cloudy light so will be the most red image.
CLOUDY
As shaded white balance, red has been added to the image and so
the building has a red tone rather that the white shad it actually is.
SUNSET
This series of images shows the same sunset scene
taken with different WB settings
tungsten

auto

shade

cloud

daylight

pre set to external light

Light at sunset is warm in the Kelvin scale and the camera
reads the light as red so will automatically try to cool the
image by adding blue to the captured tones.
Tungsten light is also read as warm by the camera so
also require blue to cool the image and make the tone
closer to white.
The tungsten wb clearly shows the lamp colour neutralised
by makes the external colour too blue.
The auto pre set again adds blue and the external light
is more neutral but the internal light is very green
The cloud and shade presets shows how the camera
wants to warm the image and exaggerates the red tone
in the image. The external light looks warm and
reflective of the late setting sun, but the internal
colour is too enhanced and looks unnatural
The daylight setting is close to Auto and as before
changes the internal light colour but less dramatically
different
The pre set wb was set to the external light.
This has clearly captured the external light
well but the Tungsten is still too red
I think the best capture for colour tone is
auto in this situation.
I think I would like to try this exercise again
with external lights and sunset to re look
at these WB settings
USING COLOUR BALANCE FOR CREATIVE EFFECT
Ascetically colour balance can be used to enhance images.
As demonstrated in this exercise the camera will warm or
cool and image when white balance is changed to
different settings. Creatively you can use this change is colour
to enhance iamges to alter the colour of an image either in the
camera or in processing.
Below are images that have been enhanced in camera
when the RAW image was taken.
The image was taken to white balance set to auto

I wanted to enhance the blue tone of the image so
I changed the WB setting to Tungsten and the
second image the blue tones were altered for
creative effect.


This late night shot of sunset over London was taken with white
balance set to Pre set to the light available. The sunset red light is
enhanced with the red to the tungsten city lights.

I then took image with the camera WB setting for FLUORESCENT
which has completely changed the image tones to blue and green.
I really like the alternative " cool" image.
LESSONS LEARNT
This exercise has allowed me to revisit the use of white balance.
I prefer setting white balance to pre set ( custom) as I feel
white balance is best set to the actual available light in the
scene you are shooting. I usually set the white balance to
the sky levels. I an going to carry a grey card with me on
location and set the with balance off the grey card light
reading, Most images I have not been able to capture
a true white level, and hope using a grey card will
help that. I was also continue to use white balance
creatively to see if I can add to an image by altering
the colour of the RAW data when the image is taken
No comments:
Post a Comment
Note: only a member of this blog may post a comment.